How to Have a Successful Garage Sale


Spring is a time we un-clutter our world.  If you have lots of excess stuff to get rid of consider holding a garage sale.


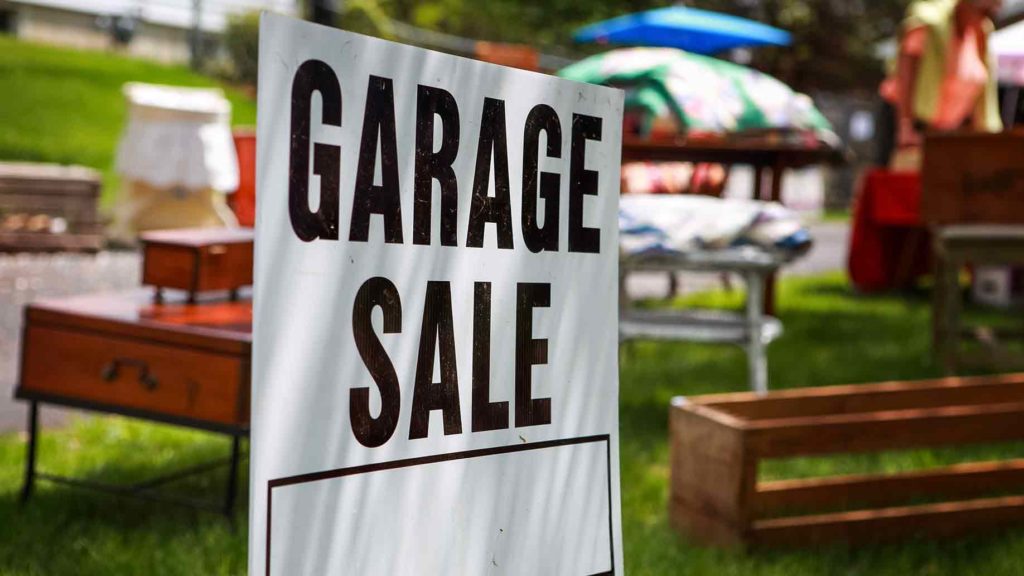
Having a garage sale takes work and can be extremely frustrating if you don’t know what you’re doing. To avoid any headaches and to streamline the process, follow a plan from beginning to end. A well-planned garage sale often means a more successful one, which means more money in your pocket at the end of the day.

Planning Your Garage Sale


1. Pick a Date

The first step is to choose dates and times for your garage sale. Most people go with Friday and Saturday mornings, but you can add Thursday or Sunday to a multi-day sale if your schedule allows. You’ll get a larger crowd if you start early because people won’t have to interrupt their day to attend your sale, and it’s likely to be cooler out which is an important consideration especially in the heat of summer. I typically run my garage sales Friday and Saturday from 6 a.m. to noon.

Pro Tip: If possible, hold your garage sale when the weather is moderate. Skipping out on the sweltering August heat and waiting for the end of September will give you a better shot at having a successful sale. You’ll get the most customers in the late spring or early fall.

2. Gather Your Goods

Garage sales offer a great way to declutter and downsize your house. Grab a box and go through every room. Pick up anything you don’t want or haven’t used in months and toss it in. Don’t forget closets, attics, basements, and garages as these are usually treasure troves for garage sale finds. Don’t underestimate the value of what you find either; people will buy anything from old CDs to unwanted bottles of perfume. After all, the worst case scenario is that something doesn’t sell.

Pro Tip: Have any old power strips, cell phone chargers, or USB cables you’re not using? Throw them in a separate shoe box to sell at the garage sale. It doesn’t matter if you’re not sure what that charger even worked for; someone may buy it.

3. Check on Permits

Many cities now require that you have a permit to run a garage sale. Check with a clerk at your city or town hall to find out if you need one. Don’t try to run a garage sale without it or you may end up getting shut down and fined.

Pro Tip: Some cities allow you to apply for permits online. Check your town hall website and look under the “permits” or “civic responsibilities” section to see where you can apply.

Advertising Your Garage Sale


1. Create a Newspaper Ad

If you want to drive major traffic to your garage sale, fork up the money to pay for an ad in your local newspaper. But before you write your ad, find out how much space you get for the price you’re willing to pay. If you go over, you’ll end up paying per word, which can get very expensive fast. Keep your ad short and pointed, and list your biggest ticket items first. The most popular garage sale items include furniture, kids’ toys, and collectibles. Don’t forget to include your address as well as the dates and times your sale will run. The Rocky Mountain Outlook and the Crag & Canyon are two great local options.

Pro Tip: Consider advertising in your local paper as well as the major daily newspaper in your area. Most local papers charge $15 or less for ad space, and every home in the area gets a free copy, which means more potential customers for you.

2. Advertise Online

There are dozens of websites where you can advertise your garage sale for free. Post an ad on as many as you want, but aim for at least three. For example, I use:


You’ll have more wiggle room in the text of your online ad since most websites give you a generous word count. Feel free to describe your items in detail, but avoid sounding like a marketing executive. Simply tell people what you have and when you’ll have it, and let their own imaginations work out how wonderful it is. Also, don’t post your ad too early. If you’re holding your garage sale on Friday, it should go up Wednesday night or Thursday afternoon.

It’s also a great idea to utilize free social media marketing sites to get the word out in your local area.

Pro Tip: Write your ad in a word processing program and simply copy and paste it to each listing website site. This will save you the hassle of retyping it over and over again.

3. Make Yard Sale Signs

Check the laws in your area before making garage sale signs as some places have banned them. A clerk at your local police station can tell what you can and can’t do. If you are allowed to make signs, I’ve found that brightly colored poster board and a Sharpie is all you really need. Make sure your sign says “Garage Sale” large enough for people to see as they drive by. Include your address or an arrow pointing towards your house.

Pro Tip: Wood paint stirrers make great posts for sticking garage sale signs in the ground. You can get the stirrers free from most home improvement stores.

Prepping for the Sale


1. Get Supplies

Make sure you have everything you need at least a day before the garage sale starts. You’ll need chairs to sit on, a table or other flat surface to take payments and provide change, and plenty of areas to display your goods. Don’t waste money on renting or buying tables. You can find or make enough surfaces to suit your needs.

For example, I gather up all of the card tables and patio furniture I can find for placing breakable items on. For smaller, non-breakable items, I put a board over two milk crates. For clothes, you can use a garment rack or hang them on hangers off the top of your garage door.

Pro Tip: Keep tables with breakables off to the side of your sale or against a fence. Unattended kids love to run underneath tables, so the more centrally located they are, the higher risk you run of the table being knocked over.

2. Don’t Forget the Change

Odds are, you’ll have to make $19.95 in change for your first customer. Make sure you have fives, ones, and at least twenty dollars in quarters. You can get them from your bank, but you’ll have to go inside a branch to do it.

Pro Tip: Ask the bank for a reusable cash envelope. Many branches are happy to give you one. You can use the envelope to run extra money back into the house throughout the garage sale so you won’t have tons of cash lying around outside.

3. Sort Your Items

Sort before your price. It’s the easiest way to keep your garage sale organized and make it easy on potential buyers. Dedicate a room in your house to garage sale planning and divide all of your items by category, such as clothes, books, home goods, and kids’ toys.

Pro Tip: If you have a lot of clothes, divide them by men’s, women’s, and children’s. Most people are looking for something specific and will appreciate the organization.

4. Price Your Items

It’s best if you price your items individually rather than just group them into boxes with one price sign. As the garage sale progresses, people will get the boxes mixed up and you’ll have a hard time keeping it organized. To price items, I just use a roll of manila tape and a Sharpie, which is a lot cheaper than going out and buying fancy price tags.

Pro Tip: Don’t increase your prices on the assumption that everyone likes to haggle. While many people do enjoy a good verbal match, some will just walk away if they think items are priced too high.

5. Organize and Arrange Your Sale

Arrange your tables and put all the clothes on hangers the night before the garage sale. No matter what you tell yourself, you won’t have enough time to do it in the morning. I arrange everything the night before and store it in the garage for safekeeping. Map out where everything will be placed to make the morning setup as easy as possible and to keep it in a logical and organized fashion for customers.

Pro Tip: If you can’t put everything in the garage the night before, group similar items into laundry baskets and boxes. You will save time in the morning if you only have to pull items out of boxes that don’t require further separation.

Throwing Your Garage Sale


1. Get Ready

Give yourself at least an hour before the garage sale starts to set everything out and put up signs. Make sure you have your change in a safe place, and find a comfortable, shaded area to sit.

Pro Tip: If your garage sale is hard to spot from the street, place a yard sale sign in front of your house so people know where to stop.

2. Work the Crowd

In an ideal world, a garage sale would work like Target. People would come in, grab what they wanted, pay, and leave. Unfortunately, people see garage sales as a sort of interactive shopping experience. They’re going to ask questions, they’re going to haggle, and they’re going to pick up everything, especially if it’s breakable. You’ll do better if you don’t act pushy. Just stay seated, shout out a friendly hello when people walk up, and let the customers come to you.

Keep in mind that you don’t have to haggle right away. Don’t let your couch go for five dollars with the first customer. Odds are that someone else will come along willing to pay your asking price. Start haggling like crazy using effective negotiation strategies on the last day, or in the afternoons after the morning rush.

Pro Tip: Position your chair so that you can easily spot people walking up and make sure you greet everyone. Saying a quick hello makes shoppers more comfortable about standing in your driveway.

3. Deal with Leftovers

You’re going to have leftover stuff. You can just put it all on the curb with a free sign, but that won’t get you any more money. Instead, consider taking the leftovers to Crossway Thrift Store. 

Pro Tip: If you have large items left over, like a couch or a TV set, consider selling them on Craigslist. Craigslist surfers love to buy big-ticket items and you’ll make more money than you would donating them and using the tax deduction.

Final Word

Garage sales are a lot of work, especially if you’re not used to holding them. You’ll probably spend several hours organizing and pricing items, writing ads, and getting your supplies. But after it’s over, you’ll hopefully have a wad of cash instead of piles of stuff you don’t want, which makes it all worthwhile.


Source Article https://www.moneycrashers.com/successful-garage-sale-tips/
by Angela Colley

The Boler has enjoyed 50 years of bringing up the rear


Last June, I reluctantly agreed to go with my sister and have a look at a 1979 Boler. We had long been scheming and dreaming about buying an adventure vehicle, and liked the humble Boler, an egg-shaped trailer with Canadian roots. But it felt like the time for such whimsical plans had passed. I had developed a love of backcountry camping. My sister was getting married in a few months, while other friends were buying houses and starting families. Co-owning an aging trailer did not seem sensible at this stage in life, especially given my limited recreational vehicle know-how.

My sister convinced me that the trailer was worth at least a look. It belonged to her co-worker’s neighbour, an older man who’d owned the trailer for just a few years but had fond memories to share of trips he had taken, including one to the Yukon. When I saw the cream-coloured Boler with its orange and mustard-yellow stripes parked beneath a tree in the man’s backyard, I was instantly smitten. The impracticalities of trailer ownership were suddenly outweighed by the possibility of adventure.

We bought the Boler. In August we’ll pack it up and drive to Winnipeg, the city where Bolers were invented 50 years ago for a five-day-long homecoming party. If everything goes according to the plans of Ian Giles, the Calgary mastermind behind this ultimate Boler fĂȘte, thousands of people from across Canada and the United States will descend en masse, tiny travel trailers in tow.

Recreational vehicles tend not to receive birthday celebrations of any size, let alone golden jubilees four years in the planning. But the Boler is not just any trailer, as Giles and other fervid fans will attest. The vast and tight-knit community of Boler enthusiasts already converges at annual rallies with names like the Omelette and Bolerama. Giles and his co-host Rick Mooyman plan to bring this clan together on an unprecedented scale: 1,000 moulded fibreglass trailers, ranging from the original 1968 Boler to new trailer brands inspired by the Boler’s design.

Giles’s own Boler story (every owner has one) starts in late 2010, with a simple desire for a better night’s sleep. Giles and his wife, Joan, had long enjoyed tenting with their two children in the Rocky Mountains. As Giles aged, the appeal of sleeping on the ground faded. “At one point I just said, ‘You know, I’ve had it with tenting, we need a trailer,’” Giles says. He wanted something small and lightweight so that he wouldn’t have to buy a special vehicle to tow it. Giles took his trailer search to Kijiji and immediately saw a 1974 Boler for sale.

“I knew of Bolers, but not much other than they’re these cute little things,” he says. Giles and Joan contacted the seller. The Boler had a faded yellow bottom and white top. Inside, it was in nearly original condition, right down to the burgundy, off-white and green plaid cushions. There were a few additions, including new cupboard doors and a brown carpet, worn and stained. Giles, who worked as a mechanic before moving to a career in human resources and corporate learning, thought the trailer looked fine for its age. The Gileses paid $4,000 and towed their trailer home in January 2011.

On their first camping trip over the May long weekend, the Boler drew lots of attention, but two problems emerged. “We love cooking, and the eight inches of counter space between the sink and the stove just wasn’t enough space,” Giles says. “And we love each other dearly, but the 44-inch wide bed was just a little too cosy.” Giles made a quick fix for a bigger kitchen counter, and the couple used their Boler many times that summer.

Giles was happy with his work, but began thinking about further modifications. “To me, everything can be improved,” he says. He began researching, reading forum posts and watching videos about other Boler renovations. Then he set out to winterize the trailer. Joan shakes her head as her husband recounts the story; winterizing turned into Giles pulling out the ugly carpet, then the kitchen cabinets, and, finally, the seating—essentially an unexpected gutting of the trailer. When Joan saw the aftermath, her husband had just two words for her: “Trust me.”

The compact Boler (a mere 13 feet long) has wooed buyers like Giles for decades. Boler inventor Ray Olecko sought an everyman—and woman—trailer. No matter the size of your tow vehicle, your mechanical knowledge, or your physical strength, the Boler was for you. Olecko even wanted to lowercase the “b” in Boler, in a bid to be less pretentious. (It didn’t take, but in homage my Boler’s name is betsey.)

Olecko was born in Lamont, Alta. in 1930. He started boxing in his teens and spent three years in the air force. But, in the words of the obituary that ran in the Winnipeg Free Press in 2001, the “love of his life” was design. The first of his many patents was for a fibreglass slingshot that was sold worldwide, and he later designed a fibreglass septic tank that inspired his “proudest moment,” the Boler.

Olecko worked with Sandor Dusa, a mould maker, to design and manufacture the trailer, which is made by joining top and bottom fibreglass shells. (Boler lore has it that the name comes from the trailer’s resemblance to a bowler hat.) The fibreglass construction made the units significantly lighter than existing aluminum trailers, at a time when smaller cars were becoming more common.

“I didn’t want a large trailer,” Olecko told the Free Press in August 1968, two months after Boler Manufacturing Ltd. began operations. “But I did want one that had a cooler, stove and sink, plus some cupboard space, and a few other comforts of home.” Olecko’s interior design accommodated a family of four, just like his own, with a folding dinner table that doubled as a bed, and a couch that converted to small bunk beds. In those early days, the company had eight employees and produced three trailers a week. (A July 1968 classified ad advertises the “first in North America, built to last a lifetime” travel trailer for $1,495.) From the get-go, Bolers proved popular with hunters, fishermen and middle-class families. Olecko predicted that his awkward-looking trailers would revolutionize the industry.

Tom McMahon has woven together the definitive history of the Boler, a project he started after buying a Boler six years ago. As McMahon’s wife and father-in-law fixed up the trailer to match a 1953 Mercury pickup truck, McMahon, who says he’s not handy, turned to research. The Winnipeg man compiled information published on travel trailer forums, dug into archives, and talked with the families of Olecko and Dusa. Before he started the deep dive, McMahon had no idea the Boler was a Winnipeg invention.

From those Winnipeg roots, the Boler blossomed. Several franchises were set up in Canada and the U.S. to manufacture and sell the trailers, including in Grande Prairie and Peace River. In 1973, Olecko and Dusa sold Boler Manufacturing to Neonex, owned by Jim Pattison (the well-known Vancouver billionaire is a little-known Boler fan and still owns the trademark). Neonex produced Bolers in Calgary, including a 17-foot version, and Winfield, B.C. McMahon says the last Boler was produced in 1988 in Ontario, and an estimated 10,000 trailers were sold during the 20 years they were built.

The enduring allure of the Boler has been attributed to many factors. There’s the longevity—not many 50-year-old trailers are still on the road—that’s now interpreted as retro appeal. For Joan Giles, a big part of the draw is the ability to alter the trailer’s interior. “You can personalize it to your taste and what you want to carry and how you want to camp,” she says. Ian Giles thinks the simplicity is another attractive feature. It’s not uncommon for him and Joan to have their Boler parked, set up, and their lawn chairs out in 15 minutes. While they sit and enjoy a glass of wine, a neighbour in a fancy fifth wheel spends more than an hour levelling the trailer and pulling the slides out. As the popularity of Bolers grows, so does the price. These days, Giles says Bolers generally sell for between $6,000 and $8,000, although it’s not uncommon to see asking prices around $10,000.

The Boler’s distinct shape, recognizable from a distance, helps too. “I refer to them as memory makers,” Giles says. “When we’re camping, so many people drop by our Boler and say, ‘My grandparents had one’ or ‘We used to go to the lake in one all the time.’ Instantly it brings back memories.” And, of course, there’s the cute factor. “They’re so adorable that you just look and go ‘that is so cool,’” Giles says.

Chris Doering knows that feeling. Doering and Connie Biggart, both Calgary residents, have been “Boler spotting” for years and documenting their finds on their website, Off The Beaten Path—with Chris & Connie (bigdoer.com). Whenever they spot a Boler or a Boler look-alike, they take a picture. It’s their own version of the Punch Buggy game, a way to keep road trips interesting. Why Bolers, when Doering is not yet a Boler owner? “They’re just so darn cute,” he says. “They’re not common enough that you’re seeing them so often you become bored with it, so you have to keep a razor-sharp eye out for them.”

Back at Giles’s house, his gutted Boler underwent a transformation. He designed and built a new frame with the help of a friend who is a welder, and completely overhauled the interior. A few years later, the exterior was spiffed up with new paint. Finally Giles and his friend altered the bumpers from a 1959 Jaguar to fit the trailer, now christened Buttercup. “It is unique, and in my mind, it just suits the Boler absolutely perfectly,” he says, proud as a new father.


As Giles reverse-engineered his trailer, he learned there was a lack of detailed information on fixing up Bolers as well as some damaging misinformation. “I was seeing more and more of these Bolers that the frame was damaged on them and they were being turned into sheds in backyards or ice fishing shacks,” he says. “And in my mind, the Boler is a piece of Canadian history.”

Giles has become the Mike Holmes of Bolers. His four YouTube videos documenting his trailer reno have garnered more than 77,000 views. Giles also created boler.ca, a one-stop shop for all things Boler. It even includes a literal shop, Camping Treasures, where Giles sells hardware kits he’s designed for vintage trailers, plus a small selection of Boler-themed accessories like key chains and earrings.

Lisa Birmingham is one of many Calgary Boler owners who has sought trailer advice from Giles. She purchased a Boler three years ago with her teenage daughter Kaitlyn; together they have repaired and refurbished the Boler now named Sandy. “Having someone with that passion for Bolers that’s accessible and available, and wants to help and loves to help, has just added incredibly to the experience,” she says.

With his trailer complete and the website up and running, Giles turned his attention elsewhere. At a Boler gathering in Winnipeg in 2014, he approached the local organizer, Rick Mooyman, with the idea of marking the Boler’s upcoming golden anniversary. He didn’t know what the celebration should look like, just that it should take place in Winnipeg, the birthplace of the Boler. Mooyman signed on to co-host the event.

Since hitting the road on the Boler 50th, Giles has applied the same zeal he gave his trailer renovation. When every one of the more than 50 companies he approached about sponsoring the gathering showed no interest, he was undeterred. And when 650 trailer owners signed up at a pre-registration, Giles decided he wanted to host 1,000 trailers and secured the Red River Exhibition grounds for the expected 2,500 attendees. When he learned there were no showers onsite—a fact his wife referred to as a “show stopper”—he found a company in Saskatchewan that would bring in shower trailers.

Giles has been retired for about a year, but planning the Boler bash has become more than a full-time job for him. “The amount of work that’s going into it is just astronomical,” says Mooyman. Attendees at the five-day festival will enjoy morning yoga, mass ukulele lessons, workshops on topics like trailer maintenance and sewing trailer cushions, as well as evening entertainment. The gates will open to the public for one day, offering the ultimate Boler show and tell, including new Boler-inspired trailers by manufacturers like B.C.-based Armadillo Trailers and California’s Happier Camper. Giles has thought of every detail, from a certified drone pilot to capture aerial views of the assembled trailers to keepsake Boler pins for attendees.

Challenges remain, like the nightmarish logistics of 1,000 trailer owners arriving on one day, checking in and backing into their spots. As of mid-March, registration was slower than expected; while the event is not-for-profit, Giles needs 800 trailers to break even. Giles remains his enthusiastic self, operating at a tireless pace as he sorts out all the details. “I don’t want to disappoint anybody at this event,” he says. “I can’t let people down, so that’s what’s driving me.”

Come August, Giles looks forward to meeting hundreds of people he knows only through the online Boler community. (He says he will recognize them by their trailers.) And there’s no doubt Buttercup will be a popular attraction, inspiring others dreaming about their own renovations. At its core, though, the event is not just about the beloved Bolers. “Seeing the sea of trailers is going to be fantastic. I am so looking forward to that,” Giles says. “But I think more what I’m looking forward to is the sea of people. Just the excitement of so many people all brought together, just because of the trailer they decided to buy.”


Source Article 
Article by: CAILYNN KLINGBEIL
Photo 1 & 2 by: BRENT MYKYTYSHYN

Update your Bear Smarts

Photo by https://wallpapersite.com

Living Smart with Bears by WildSmart 

Grizzly and black bears are residents in the Bow Valley. The information below will help you stay safe while in bear country.

In most cases bears have no interest in encountering humans. However, encounters between bears and people do occur. Learn more about what to do in an encounter and what you can do to avoid them.

In the event you do come across a bear it is important to understand a bit about bear behaviour. Learn about the recommended response people should take; this is dependant on the type of interaction you have with the bear.

Avoid Bear Encounters

  • Do not approach or feed bears, this could elicit an unsafe response that could lead to human injury and/or the destruction of the bear.
  • To avoid surprise encounters, make lots of noise.
  • Watch for fresh evidence of bear activity e.g. tracks, scat, diggings, or overturned rocks and logs.
  • Travel in groups.
  • Walk your dog on leash.
  • Carry bear spray and know how to use it.
  • If you see a bear or see or smell a dead animal, leave the area.
  • Respect all trail closures and information signs. They are there for your safety.
  • Remove potential attractants from your property such as garbage, pet food, bird feeders, and berry bushes and fruit trees.

Handling an ENCOUNTER

Most encounters with bears end without injury. If the bear is unaware of your presence – leave the area in the direction you came.

If the bear is aware of your presence and does not leave, be non-threatening – speak calmly, don’t yell. Stay calm and back away slowly – DON’T RUN.

If the bear closes distance on you – even after you have tried to retreat, such behavior could be considered curious, indifferent or predatory.

If the bear continues closing distance – make yourself large, stand your ground and talk firmly to the bear.

Handling an ATTACK

You may increase your chance of survival by following these guidelines. In general, there are 2 kinds of attacks:

1. Defensive Attack

The bear is protecting a carcass, protecting its young and/or is surprised by your presence. It attacks because you are perceived as a threat. Remember bears will often bluff charge (when the animal closes distance but stops short of making contact).

  • Be non-threatening – don’t run or yell. Stay calm and back away slowly.
  • Use your bear spray.
  • If the bear makes contact with you: PLAY DEAD!

Drop to the ground face down, interlace your fingers over the back of your neck and spread your legs to make it more difficult for the bear to turn you over. By playing dead the bear will likely lose interest in you and leave. Defensive attacks are generally less than two minutes in duration. If the attack continues, it may mean the attack has shifted from defensive to non-defensive (i.e. predatory) - in this case fight back!

2. Non- defensive Attack

The bear is aware of your presence, has time to leave but continues closing distance on you – even after you have tried to retreat. This behaviour could be considered curious, indifferent or predatory.

  • Use your bear spray. DO NOT PLAY DEAD and FIGHT BACK!

Intimidate the bear: shout; hit it with a branch or rock, do whatever it takes to let the bear know you are not easy prey.

If you're planning an outdoor adventure, remember that you are traveling in bear country.

Report bear sightings to 403.591.7755
For all public safety emergencies, call 9-1-1


Bear Management in the Bow Valley

There are a number of programs currently in place within the Bow Valley that are intended to reduce the potential for interaction between bears and people. They include:

Bear activity reports - http://www.wildsmart.ca/news/category/bear-activity/

For more information and training also visit Bear Safety & More. http://bearsafety.com/

Source Article - http://www.wildsmart.ca/bearsmart.htm

A BIG Welcome to Our New Team Member

The founding partners of The Canmore Real Estate Team, Jim Ridley and Jordy Shepherd are excited and proud to introduce the newest member of our Real Estate practice, Mr. Jim Mamalis.

Jim comes to us from a management position with Parks Canada, where he worked for over 24 years, starting out as a Park Warden, working with Jordy for many of those years and from a similar Parks background as Jim Ridley did with Alberta Provincial Parks.

Jim has lived in the Bow Valley for 15 years, along with his wife Thea and two teen children. Obviously Jim enjoys the same outdoor pursuits that many of us do and wants to share his knowledge of the area with prospective Buyers that are committed to making Canmore their dream home community.

As an investor in vacation properties, Jim can advise our Clients interested in this product how to best market and manage these increasingly popular condominiums.

Why are we expanding? Jordy and Jim have, since their successful partnership was formed, been passionate about demonstrating the highest service levels we can muster to our Clients, be they Sellers or Buyers. The robust marketplace we find ourselves in now requires more resources than we have had the capacity to offer. We were faced with either turning down referrals and additional business that comes our way due to past performance, or augmenting our experienced team with someone else who can listen carefully to what our Clients needs are, put an ambitious plan in place to meet those needs and then implement that plan to achieve and exceed our clients’ goals. Jim has that ability to communicate, through many years of front-line public service. He’s organized, efficient, works hard at learning what would make each transaction successful; in a nut-shell do what it takes to get Job #1 done, your job.

We are so pleased Jim has agreed to join our team, now one of the largest true Realty teams in the valley and among the top producers, sales volume wise over the past five years. You can call us the “Three Amigos, Three Parks Protectors, Three J’s ~ but we like to think of ourselves now as Three Amazing Realtors that you can depend on ~ single point contact via team@canmorerealestate.ca, text and cell at 403-493-4663. At your disposal, now with extended hours.

Get a Shed! And 7 More Ways to Make the Most of the Long Weekend

Get your bike in order, plant tomato seedlings and make plans for a game night or a grad party

Take advantage of milder weather and longer days to get out in the garden, invite friends over for a casual game night and firm up summer plans. And with Bike to Work Day coming up on May 18, this is a good opportunity to tune up your wheels — and maybe go for a pleasure ride too. Eight could-dos for your weekend are ahead.


1. Boost backyard storage with a shed. Garden tools last longer and stay in better condition when they’re protected from the elements. If you don’t have enough room in the garage (or don’t have a garage), consider adding a small storage shed or weatherproof container to keep your tools neat and tidy.

You can purchase an off-the-shelf shed kit from a home improvement store. Or hire an architect to design a custom shed that blends beautifully with your home and landscape.

Even a tiny shed can hold a surprising amount — outfit yours inside with wall hooks or a pegboard for hanging tools, and shelves for loose items such as bags of soil. Storage space already all set up? Use your time this weekend to organize it.


2. Tune up bikes. Bike to Work Day is May 18. Take part by leaving the car at home for the day and commuting via two-wheeler instead. Work too far away to bike? Embrace the spirit of the day by taking public transportation or carpooling if possible (to spare the air), and give your bike some love on the weekend with a tune up and a ride down a local bike path.


3. Check your irrigation system. If you use a drip irrigation system, May is a good time to check that it’s working properly — otherwise, wilting plants might be your first clue that something is amiss. Turn on the system and check that the tubing is in place and emitters are working properly. If an emitter is clogged, clean it out with a thin piece of wire. If that doesn’t work, replace it.

Thinking of adding a drip irrigation system? It’s a doable DIY project, but plan on a day or two of work to set it up. You’ll also need some basic parts, which can be found here or at a local home improvement store.


4. Plant tomato seedlings. Check your local nursery for tomato starts — there should be a good selection at this time of year, including heirlooms and unusual varieties. Wait until all danger of frost has passed and the soil has warmed before planting. Tomatoes love full sun and rich, well-drained, neutral or slightly acidic soil.

When you’re ready to plant, remove the bottom two sets of leaves from each transplant. Dig a hole deep enough to cover the stem up to the bottom of the remaining leaves and add amendments. Set in the plant, add soil and firm the plant in place. Leave 2 to 3 feet between plants if they will be staked or in cages; 3 to 4 feet otherwise.


5. Compost kitchen scraps. Backyard composting may seem daunting, but it’s not as hard as it looks — and with farmers market season (and all of those fruit and veggie trimmings) right around the corner, this is a good time to get your compost going. To start making your own “black gold”:
Purchase a composter from a garden store or city disposal station, and place it in a flat, partly sunny outdoor spot with good drainage.
Create a 12-inch base layer of straw, dry leaves or a woody brush material for air circulation.
Add a nitrogen-rich green material (kitchen scraps, lawn clippings) to your composter, always alternating each layer with a layer of carbon-rich organic material (like straw, dry leaves or newsprint).

Every two weeks, mix the contents in the bin to aerate the materials. The pile will shrink over time. Continue to add layers until the bin is almost full.
In about six months, you can harvest the compost.


6. Host a game night. Whether you invite friends over or keep it small, hosting a game night is a low-key, budget-friendly way to catch up after a busy week. Serve simple snacks like popcorn, make it a potluck or go all-out with dinner on the grill.

If you’re inviting people over, ask each person to bring a game. Be sure to go over the rules for each game before you begin — even if it’s a classic game, someone might not know the rules and be too embarrassed to ask. And if you’re expecting a big crowd, set up several games at different tables (the coffee table totally counts) so everyone can play at once.


7. Get ready to celebrate grads. Have friends or family graduating this spring? Carve out some time this weekend to shop for cards and gifts. If you have enough lead time, consider making a special photo book or album — it’s sure to be well received by grads of all ages. Or frame a favorite photo or two for a quicker gift that still has a personal touch.

And if your house will be party central, make a master to-do list so you don’t forget a thing, from the festive drinks to the cake. Shop in advance this weekend for nonperishable items, and you’ll be ahead of the game.


8. Finalize summer plans. We’re peeking over summer’s shoulder now — so if you haven’t nailed down summer plans yet, make it a goal to get it done this weekend. Book a trip, brainstorm ideas for a staycation or simply come up with a list of fun day trips to sprinkle throughout your summer weekends.

And if you will be going away at some point during the summer, remember to book the pet sitter or housesitter and have your mail held at the post office.

All About Screen Doors


Here’s everything you need to know about selecting, installing, and maintaining this summertime essential.

Breezes in, bugs out—functionally speaking, the screen door hasn’t changed much in the past hundred years or so. Different types, however, and their varying price points have emerged in more recent times. If you’re in the market for one to separate your indoor and outdoor spaces, read this before you shop. You’ll find all the guidance needed for selecting and installing a screen door that’s ideal for your house and budget.

Screen Doors vs. Storm Doors
Screen doors are different from storm doors, though the terms are often erroneously used interchangeably. Storm doors, as the name implies, are designed as barriers against inclement weather. Though their frames are rugged (made of steel, vinyl, or aluminum), they may have a screen along with a sliding glass panel to let air pass through at your discretion. Standard screen doors, however, aren’t intended for heavy duty. If you’re looking for protection against the elements, opt for a specialized storm door.

Types of Screen Doors
Three varieties of screen doors exist to supplement the myriad of home entrances.

• Perhaps the most familiar style, one known to go hand-in-hand with a picturesque front porch, the traditional type fits in the outer portion of an exterior doorjamb and opens outwards. Purely functional, bare-bones models are suited to side or backyard entries, yet you can certainly find a stylish one to complement a front door. These traditional screen doors come in standard sizes and are typically made of wood, although aluminum and vinyl versions are available.

• Some homeowners prefer a retractable screen for a front door. Based on the principle of pull-down window blinds, the retractable screen is stored in a spring-loaded casing, positioned either at the side or at the top of the doorframe. You pull it across or down when you want to leave a door open to get a breeze and block bugs. It’s appealing for a front entrance, since it’s all but invisible and won’t interfere with curb appeal.

• Finally, there are slider screen doors that install on the exterior track of a sliding patio door. While some patio doors do come with sliding screens, you can find add-on options for an existing sliding door.

Pick Your Price
You can find a traditional screen door made of unfinished pine for around $30, while low-end vinyl and aluminum models start at around $50. If you’re looking for stainable hardwood or an ornate design, the cost could go as high as $200.

Retractable screens start at around $30 but these cheaper models don’t offer sidetracks, leading you to potentially deal with gaps at the edges. High-end models, running $500 or more, have a variety of bells and whistles, including secure tracks, motorized remote-control operation, and double-door protection for French doors.

Sliding screen panels for patio doors start around $40 and come in standard sizes, but not all sliding doors accept generic screens. Check with the manufacturer of your patio door to determine if you need to order a custom screen, which could run upwards of $100.

Make Sure to Measure
Screen doors come in standard sizes. For a traditional screen door, measure the door you’ll be pairing it with and purchase a screen door in a matching size. If you have an off-size door, consider purchasing the next size larger wooden model and cutting it to fit. Most, but not all, retractable screens require measuring the inside of the doorjamb. Read manufacturer’s measuring instructions (usually posted on the outside of the box) to be sure. For a sliding patio door, measure the door panel that slides and purchase a corresponding screen panel.

Screen Door Installation
Because models vary so, installing a screen door entirely depends on the variety you’ve chosen for your home. Many homeowners are drawn to the traditional screen door for its simplicity, as it requires little more than attaching the hinges and pull-handle with the screws that come included. You’ll need a drill with a bit slightly smaller than the screws, a screwdriver bit, a tape measure, and a pencil for marking where to drill pilot holes. Install the hinges at the same level as the upper and lower door hinges, or about eight inches from the top and also from the bottom. Similarly, the handle should be placed at the same height as the exterior doorknob. Use shims, as needed, under the hinges to center the screen door in the jamb. (It’s standard to leave a 1/8-inch gap around the sides and the top, and a 3/8-inch gap, or larger, at the bottom.)

Most traditional screen doors are universal, meaning you can install them to open on the either the right or the left, depending on your preference. The spring that holds the door closed installs midway on the door, typically behind the push bar, on hooks, so you can remove it when you want to open the door all the way.

Retractable screen installation differs by type and brand, so follow the manufacturer’s instructions. Typically, you’ll use the same tools needed for traditional screen door installation, but if you’re attaching a bottom track to a concrete or brick porch, you’ll also need a masonry bit and concrete screws. Some higher-end retractable screens do require professional installation.

Last but not least, installing a screen door that slides is all about track placement: Position the door in the exterior track and lift it up to hook the rollers in the upper track runner. When it’s in the right spot, it should slide smoothly.

Seal and Secure
Most wooden screen doors come painted, but often the top and bottom edges are raw wood. Sealing the raw edges with exterior paint that matches the door before installation will prevent premature weathering. If you purchase an unfinished door, paint the whole thing with quality exterior paint, or stain it and brush or spray on a coat of spar varnish to keep it looking new. Vinyl and aluminum screen doors require no additional weatherproofing.

If the bottom of the screen door has a large gap, consider installing a door sweep. Available at most any hardware store, this add-on attaches to the bottom of the door to keep out dust and crawly bugs.

After installation, enjoy the easy, breezy nature of your new screen door—and don’t let it hit you on your way out!

Source Article Bob Vila

Dandelions the Snack Food for Bees


Every year at this time there are lots of questions about how to get rid of dandelions and lots of concern about honeybees needing dandelions to survive. Most of the argument is based on emotion on both sides. Proud lawn owners want a nice smooth carpet of lawn. Beekeepers and nature-lovers want plenty of food for the bees and other creatures. The truth, like most things, is somewhere in between. So let’s look at the issues and see what we need to know to make good decisions.

Dandelions: Bee Feed or Pesky Weed?

Common dandelion, Taraxacum officinale, is both native and introduced in the US depending on the subspecies, making dandelions a natural part of many environments in the wilds around us. Honeybees are imports from Europe, Africa, and Asia. At least the European bees would have been familiar with dandelions from thousands of years of interaction. Any sunny spring day in a meadow filled with dandelions will tell you that the bees use them, but a closer look will tell you a lot more. The first thing that I have noticed is that the bees seem to prefer visiting apple and maple trees over the dandelions even though the main bloom time is the same. A little further research on Google Scholar will show that the total protein content for apple and maple pollen is above 20%, indicating they have enough amino acids that the bees could feed off their pollen alone without becoming deficient in amino acids or protein in general.

Not the Best Source of Nutrition, but Still Valuable

Dandelions didn’t have as much information from studies listed on Google Scholar, but what was regularly covered was telling. When dandelion pollen was feed to solitary bees (not honeybees, mind you) larval development was stunted or incomplete. Studies indicated that dandelion pollen was short in essential amino acids (although exact details were not given). I could not find a single study that indicated anything other than dandelions do not have a very good protein and amino acid content. Just because dandelions are not the best protein sources for honeybees does not mean they are not valuable. Most experts feel that honeybees do better when they gather pollen from different sources, much like humans do better when we eat a wide variety of foods. And while we have a pretty good notion of what bees need as far as amino acids and protein go, we don’t know much else of what their nutritional needs are.

A Varied Diet is Most Important

So in the end it really depends on your situation. If you are in an area that provides a lot of diverse forages for your bees, they will likely not miss the dandelions. If you are in an area where food is scarce or where there is not a good variety of species, you would be best to keep the dandelions around. This is especially true if you do not have maples or apples and other high protein fruit trees around. If you are really worried about honeybees and native bees, the best approach is to find ways to provide them with an abundant and varied diet. This planting would also include flowers for different times of the growing season from different plant families. That way the local bees will not have to rely on any one type of flower, and you will have a great color display all season long.

The Royal LePage Shelter Foundation

Royal LePage Shelter Foundation


Helping Women And Children Escape Violence And Rebuild Their Lives

Because we are committed to strengthening the communities where we live and work, Royal LePage is the only Canadian real estate company with its own charitable foundation. The Royal LePage Shelter Foundation is Canada’s largest public foundation dedicated exclusively to funding women’s shelters and violence prevention programs.

Every dollar raised goes directly to helping the more than 50,000 women and children who are served each year by the shelters and support programs we fund. Since 1998, the Shelter Foundation has raised more than $27 million and currently supports 200 local women’s shelters and national partners. Our agents donate a portion of their commissions and Royal LePage offices across Canada hold local fundraising events. Our brokers, agents and staff also volunteer and provide in-kind goods to benefit the women and children residing in their local shelters.

To read brave stories of hope from families whose lives have been touched by abuse or to learn more about domestic violence, please visit us at www.shelterfoundation.ca

Royal LePage real estate agents help Canadians find their dream home. For those who do not have a safe and peaceful home, Royal LePage is also there, helping families in the neighbourhoods where we live and work.

Violence against women and their children is a significant problem in all communities in Canada. We are proud to be working with women’s shelters and our national partners to provide safety and hope to women and children experiencing violence and abuse.


Research tells us the following:

• Violence against women happens in all cultures and religions, in all ethnic and racial communities, at every age, and in every income group
• Half of all women in Canada have experienced at least one incident of physical or sexual violence since the age of 161
• Every year in Canada, an estimated 360,000 children witness family violence2
• On any given day in Canada, 3000 women (and their 2500 children) are living in an emergency shelter to escape family violence3
• On average, every six days in Canada a woman is murdered by her intimate partner. In 2009, 67 women were killed by a current or former partner.
• Physical and sexual abuse costs Canadians over $4 billion each year (taking into account social services, criminal justice, lost wages and productivity, and healthcare)5
• By supporting women’s shelters, we are ensuring that women and children have a safe place to go to escape domestic violence. With our national partners, we fund healthy relationship programs for youth and support programs that help women and children heal from their experiences of abuse and rebuild their lives.

For additional research on family violence, visit www.canadianwomen.org


To make a meaningful difference at a local level, the Royal LePage Shelter Foundation matches Royal LePage offices with a women’s shelter in their community. Royal LePage brokers, agents and staff are passionate champions for their local shelter. They help organize fundraising events and many agents donate a portion of the commissions they receive when they help their clients buy or sell a home. All support stays in the local community and because Royal LePage covers the administrative costs of the Shelter Foundation, one hundred percent of the funds raised goes toward our cause. Since 1998, the Royal LePage Shelter Foundation has raised more than $27 million.

Women’s shelters direct our funding to meet their greatest needs and priorities. Shelters use our funding to provide critical services such as: trauma counseling; job training and placement; emergency transportation to the shelter; play therapy for children; homework help for youth; renovations to existing shelters; and building new shelters. In some cases, the funds are used to help women and children after they leave the shelter and move into their own accommodations.

In addition to addressing the immediate needs women and children have for safety and support, we also take a long-term view to stopping the cycle of violence. We are a founding partner of the Fourth R, a curriculum-based education program that has been delivered in 5,500 schools across North America, and we continue to help youth develop healthy relationships through annual funding of educational programs.  With the help of our national partner, the Canadian Women’s Foundation, we support grassroots programs in every province that help women rebuild their lives after violence, that help children heal and prevent them from becoming victims or abusers themselves, and that help teenagers recognize and avoid abusive relationships. As a founding national partner of the online resource sheltersafe.ca, we are making it possible for women seeking safety to identify a shelter in a specific geographic area along with its 24 hour emergency phone line. This ensures that women and children get the help they need as quickly as possible.

Donate to this great cause. 


11 Tips - How To Stain Your Deck Like a Pro

Canmore, the land of beautiful decks with gorgeous views.  We spend a lot of time on our decks and we want to keep them beautiful.  Here are some tips to get you though your next deck staining with ease. 


Follow these steps to help guarantee a great-looking, long-lasting result.

Step 1: Take Your Time
With each step of the deck staining process, take your time. After the project is complete and your tools are cleaned and put away, nothing will have had a greater impact on the quality of the job. Take your time and allow new pressure-treated lumber to weather for a few months and dry out before staining it. Leave stain strippers on the surface long enough to break down old finishes before you rinse it off. Take your time in order to prevent overspray and spills on non-target surfaces; wait to start your project until the weather forecast is favorable.

Step 2: Preparation is Everything
Preparation is key to the final results. All wood needs to be well cleaned before staining — whether it’s a brand new deck or an older deck that’s been out in the weather and needs to be re-stained. Brand-new lumber needs to be cleaned to remove mill scale, which is a crushing of the grain during the milling process. If it’s left uncleaned, it can prevent wood stains from properly penetrating into the wood pores.

Sodium percarbonate wood cleaners, also known as oxygen bleach wood cleaners, are a great choice for this step. They are highly effective at cleaning the wood, yet don’t harm plant life and vegetation. Best of all, they won’t hurt you either. Their soapy consistency won’t burn your skin.

If there is a build-up of old stains on the deck, then the job gets a little tougher, but not impossible. Instead of a sodium percarbonate cleaner, you’ll need to use a wood stain stripper. Stain strippers are a little more caustic, so follow the directions carefully. They work well and will remove most weathered stains in a single application. Lastly, if there are small spots of stain that won’t come off during the cleaning process, they should sand off easily using a palm-type sander after the deck has dried. If those spots of stain are left on the deck, they will show through the new finish and detract from the deck’s final appearance.

Step 3: Brighteners are Beautiful
In the deck staining process, no step is skipped more than this one. It’s by far the easiest step to do and will have a dramatic effect on the final results. Wood brighteners are easy to apply. They help open up the surface of the wood to improve penetration, neutralize any stain strippers that were used, and restore the appearance of old, weathered wood to look like new again. That’s a lot for one product to accomplish, but brighteners will do all of that, so don’t skip using them. To use them, simply spray them on, wait a few minutes, and rinse them off. No scrubbing, no ‘elbow grease’ needed. They’re so easy to use and have so many benefits, there’s no reason not to use them!

Step 4: Rinse Like Mad
Use plenty of water after using any cleaning chemicals. Even though some of these chemicals can seem safe and harmless, they all need to be rinsed off extremely well after they are used. Left in the wood, these chemicals can resurface over time and begin to attack and break down the new stain. So once you are done cleaning, rinse the deck thoroughly to get all of the chemicals out of the wood.

Step 5: Stay Away From the Cheap Stuff
Now that the deck is clean and dry, it’s ready to be stained. Before you decide which stain to buy, keep in mind that you always get what you pay for. Better ingredients cost more money. If you expect premium results, then you’ll need to buy a premium product. Quality differs in resins, pigments, mildewcides, and many other materials that make up a gallon of wood stain. So stay away from the cheap stuff if you expect it to last.

Step 6: Take a Look at Waterborne Deck Stains
Water-based deck stains have become really popular in the last few years. If you have been reluctant to try them in the past, don’t be reluctant any longer. Air quality regulations have forced manufacturers to really improve these products, and some are now better, more durable, and longer lasting than conventional oil-based alternatives. They offer some distinct advantages that oil-based stains can’t offer. Good quality, water-based stains clean up with soap and water, have no nasty solvents, have a significantly better resistance to weathering, don’t need the wood to be completely dry, dry more quickly than solvents, and are much easier on the environment.

Step 7: Read the Can; Follow the Directions
Every product is a little different, so always read the label for directions. It only takes a few minutes and it will ensure that you have all of the right information before you get started. Pay attention to how many coats of stain to apply, how long to wait between coats, how long to wait after cleaning, and how long to allow wood to weather. Read the label first and you’re likely to get it right the first time.

Step 8: More IS NOT always Better
Semi-transparent deck stains are a great choice because they allow the natural grain of the wood to show through, allow the wood to naturally breathe, and are easily cleaned and reapplied. Pay attention to the directions and don’t over apply these types of products. When too much stained is applied, a film can form, much like paint, that will no longer allow the wood to breathe; the end result is peeling, which is a real mess. Only apply as much stain as the wood can easily absorb.

Step 9: The Paint Brush is Still King
Deck stain can be applied in several different ways. Using a pump-up garden sprayer and roller are two popular methods. An even better way is to use A car wash brush that is available at most home improvement stores. Using this to stain the horizontal boards will save your back and your knees and allows you to move much more quickly than using a small paint brush.

Regardless of how you apply your wood stain, keep a paint brush at hand. A paint brush is necessary for the vertical posts and railings and will work the stain deep in to the pores of a board. The agitation and friction caused by a paint brush will cause the wood to absorb more stain. So if you are spraying or rolling the stain, always back-brush it in with a brush while the stain is still wet; you’ll achieve much better penetration in to the wood. Watch the short video clip below for the best type of brush to use.

Step 10: Let it Dry
Step one of this article told you to take your time. When your project is finally done, take a little extra time before you start use it. Let your deck dry out well before putting it back in use. The stain needs to cure out before being subjected to the rigors of patio furniture and foot traffic. You’ve done everything correctly to this point, so make sure you allow at least 24 hours for it to dry out before using it.

Step 11: Maintain It
A small amount of effort can keep your deck looking great longer. Just as you would wash the dirt off of your car, you should occasionally wash down the surface of your deck to keep leaves and dirt from damaging the finish. If the deck stain starts to show signs of graying or loses its color, it can be easily cleaned up with a little wood brightener and a light maintenance coat of stain.

Conclusion
That’s it; eleven keys to deck staining success. Go ahead and try them to see what the results are when you set out on your next project to do it like a pro. You may just surprise yourself!

Nearly half of existing mortgages face renewal in 2018: CIBC report


The Canadian Press

Nearly half of all existing mortgages in Canada will need to be renewed this year, substantially more than in prior years, according to a new report, amid rising interest rates and new rules that make it tougher for some borrowers to shop around.

A CIBC Capital Markets report suggests an estimated 47 per cent of all existing mortgages will need to be refinanced in 2018, up from the 25 to 35 per cent range in a typical year.

The increase is an unintended consequence of various rounds of regulatory changes in the past few years aimed at reducing risk coupled with rising house prices that made it harder for homebuyers to qualify, said Ian Pollick, CIBC’s executive director and head of North American Rates Strategy in a report released Tuesday.

“Over the past two to three years, as home prices have risen unchecked, you’ve had people trying to get into the housing market unable to afford longer term mortgages and taken out short-term mortgages,” he said in an interview. “And in 2018, everything is falling on top of one another.”

The increase in renewals comes as mortgage rates have been rising.

Recent Bank of Canada interest rate hikes have pushed up variable rate mortgage rates, while five-year fixed rates up about half a percentage point compared with a year ago as yields on the bond market, where the big banks raise money, have been on the rise since late last year due to an improved economic outlook.

Meanwhile, new lending guidelines introduced this year stipulate that homeowners looking to renew their uninsured mortgages are subject to a new stress test, unless they stick with their existing provider, hobbling their ability to seek out a more competitive rate.

Under the tighter lending guidelines, known as B20, homebuyers seeking a loan from a federally regulated lender must prove they can service their uninsured mortgage at a qualifying rate of the greater of the contractual mortgage rate plus two percentage points or the five-year benchmark rate published by the Bank of Canada. An existing stress test already requires those with insured mortgages to qualify at the central bank’s benchmark five-year mortgage rule.

However, borrowers who renew their uninsured mortgage with their existing lender are not subject to the new stress test, which took effect Jan. 1.

In turn, there is less incentive for lenders to offer lower rates to compete for market share, as they did during the so-called “mortgage wars” roughly five years ago.

“Some of their customers won’t be able to leave the bank,” said Scott Hannah, president and chief executive of the Credit Counselling Society. “Where is the motivation for financial institutions to offer the best rate?”

Craig Alexander, chief economist for the Conference Board of Canada, said the new underwriting guidelines were necessary to limit the growth in household debt and contain the associated risks.

“It’s just going to be a shock for some Canadians when they go shopping for a mortgage,” he said.

Mortgage broker network Dominion Lending Centres spokesman Dave Teixeira said clients looking to switch do have other options, such as credit unions which are provincially regulated and not required to implement the stress test. However, it is taking longer for its brokers to find another suitable lender, he added.

Alexander said Canadians will likely renew their mortgages at rates higher than they have currently, which will have a financial impact. He expects the share of income going towards servicing household debt to rise over the coming year, contributing to the trend of slowing consumer spending.

However, the economist stressed that interest rates still remain “incredibly low” and he does not expect the central bank to raise rates until next year.

“They have increased from where they were, but when you look at debt service costs for Canadians, they’re still quite manageable, except for a very small portion of the population,” Alexander said.

Research conducted by CIBC Economics suggests that just 20 per cent of all outstanding mortgage and non-mortgage debt is exposed to higher rates, said Pollick.

“This is a small proportion and, should have limited near-term ramifications,” he said. “Over time, as interest rates continue to rise, it will at some point in the future restrict consumption patterns.”

Source Article - Calgary Herald